Guide for Making Chocolate

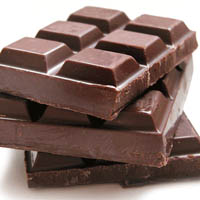
Chocolate has its timeless charm which hooks many a person with a sweet tooth. Then again, some of the chocolates are really expensive. In reality, given a few tips and tricks, you can actually create your own chocolate and save yourself money and increase your delight because of your self-creation.
Essentially, making chocolate begins with the conversion of cacao beans into the bars of chocolate we see in the supermarket shelves. Some other people enjoy eating the cacao beans in its raw form, since it has the basic component that we crave for in the processed chocolates.
A chocolate maker must have persistent attention to detail and dedication to constant practicing. This guide will not ensure to make a chocolate factory out of your kitchen, but it will surely give you the basic idea– just enough for you to enjoy a bar or two of chocolate at any time you wish without hurting your budget. Moreover, since you are directly involved in making your chocolate, you get to know the materials and amount of calories you are placing in every bar.
It begins with Cocoa Beans
If you are familiar with brewing coffee, it is similar to the beginning of the chocolate-making process. You need to roast the beans. But then, do not roast it too much. Initially, place it in a high temperature, then slowly diminishing the temperature afterwards. Turn the heat off right before the moment the beans hit their cracking or breaking point. You can do this either on your oven.
Or if you are planning to feed many people with your chocolate, have a larger container to accommodate the huge number of beans. From time to time, test the taste of your chocolate. The moment you start tasting chocolate from the cocoa, it is also an indicator to turn off the heat.
After roasting, the beans must be cracked open, removing the hard husks. You can do this by hand or with use of a small hammer. Depending on the size of your beans, you can use other tools for cracking, since the husks are not that useful for eating. Once the husks are removed, you can now grind the remaining portions until it liquefies. You must thoroughly liquefy the said concoction in order to help you become a home chocolatier.
Coco gets refined over time.
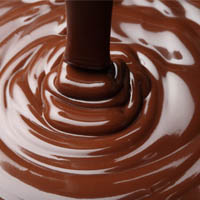
The process of conching involves the refinement of chocolate. It may require you to have certain equipment such as the Sancha refiner, which is a common favorite among home chocolatiers. This is where you start adding sugar and milk as part of the delicious chocolate mixture.
You will need to refine and conch for a long time, approximately 10 to 30 hours in length, until you achieve the balance of the ingredients. Excessive refining will turn your chocolate into gum, so be very careful. At this point, even when you let the mixture rest, it must not solidify yet.
Packaging Chocolates: Tempered after refinement.
When you are finished refining your chocolate, you need to make sure that it is under the right temperature before you place it in the mold. Not doing this meticulous tempering process will make your chocolate lumpy and unbalanced.
The rich, creamy quality of most chocolate bars in the market come from effective tempering of the chocolate after refinement.